Showing posts with label glue. Show all posts

Friday, 20 December 2019

Art Break! - Sleigh Gift Box and Present Gift Box


This is a two part post!

Part 1: Sleigh Gift Box


This is a simple idea for when you have a gift already purchased for someone but want to add a little extra effort/ personal touch to it.
Great for a hamper and/or you have many boxes in your house (certainly saves on wrapping paper).

To start, get a box big enough to hold your gift/s.


Standard box.

Then use a marker to draw where you need to cut to make the box into the right shape. Don't worry about the marker being all over the box, this puppy is getting painted.


Cut off the excess box and cut out the runners and other decorative bits you want from the scrap cardboard.


I cut out one side and used it as a stencil for the other to get close to symmetry.

I'm going with a gold and red sleigh, but you can pick any colours you like.
I painted the outside of the sleigh red, the inside gold, and the accessories gold.


Then we glue our accessories on and VoilĂ !


Runners are up on the side because I don't need it to be like a real Sleigh.


Then you just load up your goodies, add a little tissue paper, and you have a festively prepared gift!

Part 2: Present Gift Box


This is for when you have a box that fits the item perfectly and don't want to use wrapping paper.
A more structured twist on the classic look.

I painted the box itself blue (because the recipient's favourite colour is blue).


I cut up an empty toilet roll (it was just going to be recycled anyway) into the loops and curls of a ribbon and painted them gold.


I also cut out some stars from some thin cardboard and painted them gold too.


Finally, we glue the 'ribbon' and stars on and done!


I love the way it looks!


Verdict: They loved them!

Wednesday, 10 July 2019

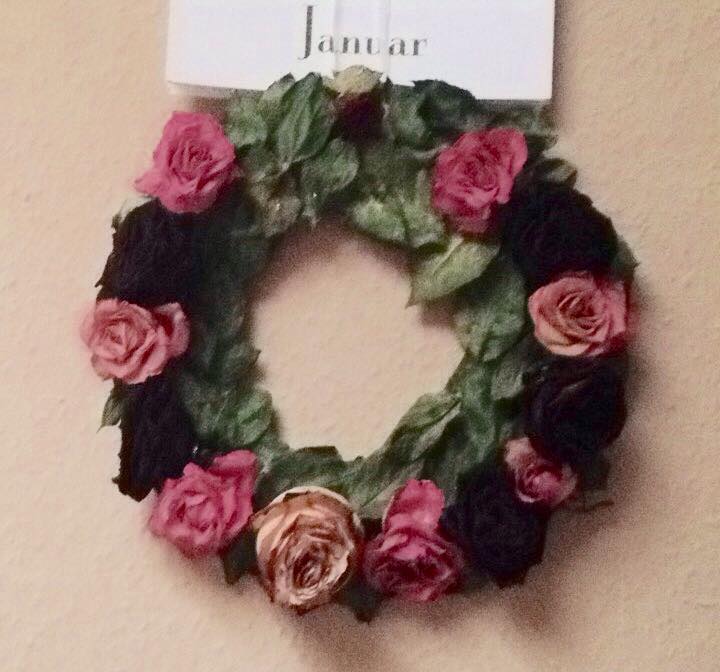
Art Break! - Floral Wreath


I have quite a collection of dried flowers, all from the lovely PB, and I wanted to do something with them.

I cut out some cardboard in a wreath shape, sticking two pieces together to strengthen it.


I painted it green.


I got ahead of my self and added glue before I took a photo.

I attached some leaves and all the roses.
This is actually the second time I glued these flowers down, thanks to Phil.


I added more glue to reinforce the flowers, then used leaves to fill in the blanks.


I attached a string to the back so I could hang it up.


Done!


Verdict: PB liked it and I liked it too! :D
- .... . ... -.- .. -. --- -. -- -.-- ..-. . . - .. ... .-.. .. -.- . .--. .- .--. . ·-·-·-

Tuesday, 15 January 2019

Art Break! - Crustacean Menstruation Station


This is a organizer for the bathroom with all your menstruation needs.
No-one will have to ask for supplies when your at my house!

I started with a cardboard box.


Which I cut into a curved shape, and cut out some legs and claws.


And one Phil.

I painted the appendages and main box red.


Cat hair by Lil.

The bottom part of the box I painted yellow then glued some sand on (because I had sand).


I added a raised section for tampons.


I drew on eyes with a permanent marker and a paint marker.


I glued on the appendages.


And glued in the separating piece.


Stocked up and done!


Verdict: I love it and PB loves it!

Thursday, 25 October 2018

Art Break! - Parcel Decoration


This is a very simple one.
I wanted to send R a birthday present and felt like decorating the inside of the box as a little extra touch.


I cut out hearts with my cutter.


And stuck them in.


Done!

Sunday, 20 May 2018

Art Break! - Facinator for Miss Buttons


I wanted to make a facinator for Miss Buttons.
I was thinking turquoise, fish, the sea, and Comrade (her pet cat).

I got some plastic cats and picked one out to be painted to look like Comrade.


And I painted him up to look like him:


I also got some plastic fish to paint.


I used some florist wire to stiffen some ribbons.


I was so glad this had a narrow nozzle instead of a wide pad.


I also got some shells that I don't think I'll paint.


I will use some thin wire to make it look like the fish a swimming.


With the fish, I found they were too heavy :( so I made some little foam fish.


Let's begin the assembly!

I made a base out of foam and attached it to the headband.


I then added my wired ribbon, shaping it into a geometic/gemstone like shape.


I then covered this base with sand.


I opened it at the wrong end. Phil also ate some :/


We add our little Comrade


And our shells.


I love the natural colours of the shells!


I also made a little seaweed out of florist wire and stuck it on some foam.


With bonus Phil paws!


I added sand to the base and wrapped the wire in string.


How lovely is this colour!


I attached it to the headpiece (as one would).

Then we add some extra ribbon, the white looks a bit like fishing net but more organic.


I added an extra blue coil to look like water.


And we add the fish!

As I put it together, I decided I really didn't like the fish.
Everything else on this piece was realistic looking, the fish looked out of place.
I had to change them.
I needed to know that I made this as best as I could.

So lets try these little guys.


That's so much better!


Finally some blue glass beads.


All done!

To pack it, I put it in fish tissue paper :D


I added some white cotton ribbon around it and a little fish on top!

I also sprinkled some hearts and stars on top.


Verdict: This was tricky and took a while to complete, but it was well received! :D